Pages

.

Jewelry Made From Recycled Plastic Bottles


I've been having so much fun making earrings and necklaces from empty plastic (PET) bottles and milk jugs!   You too can make your own jewelry from plastic bottles that would normally be thrown away or recycled. 
To make your own jewelry, use your imagination.  Save your recycling.  I think the see-through colored bottles are especially pretty.  I've saved many plastic bottles, including soda bottles, body spray bottles and even childrens' "bubble bottles".  You can purchase "findings" (links, etc.) to connect your pieces or you can use wire, fishing line or other items you have on hand. 

Be Kind to Your Mother Earth Shirts
Be Kind to Your Mother Earth Shirts by Poppyjuice
Get the best in custom tshirt printing at Zazzle

To make my jewelry I used purchased "fish hook" style earring bases and round links.  I spent just pennies per piece of jewelry.  See the photo tutorial below to make your own!  It's easy, I promise!

For more great ideas on recycling items to make beautiful jewelry and accessories you might want to check out the following resources ~

Green Bling: Turning Bottles Into Bangles (Leisure Arts #4335) (Clever Crafter)

1000 Ideas for Creative Reuse: Remake, Restyle, Recycle, Renew (1000 Series)

Jewelry Upcycled!: Techniques and Projects for Reusing Metal, Plastic, Glass, Fiber, and Found Objects


Look for bottles that have a "1" OR a
"2" in the recycling "marking" on
the bottom of the bottle.
I've found that this for the most
part includes plastic beverage containers,
medication bottles, body sprays, milk jugs,
etc.


Cut desired shapes from your empty, clean
bottles.


Using pliers or tweezers to protect your hands melt edges slightly to create desired look.  I've researched and PET bottles are considered very safe for melting and
incineration regarding toxic fumes.  I would
recommend that you use common precautions and make certain your work space has adequate ventilation. 

The plastic will sometimes curl rapidly so be very
cautious to protect your hands.  As you can
see, I often don't follow my own advice....

The pieces (depending on the shape) will
look somewhat like this when you are done melting
them.  I use a safety pin to poke holes where
I wish to attach links, etc.


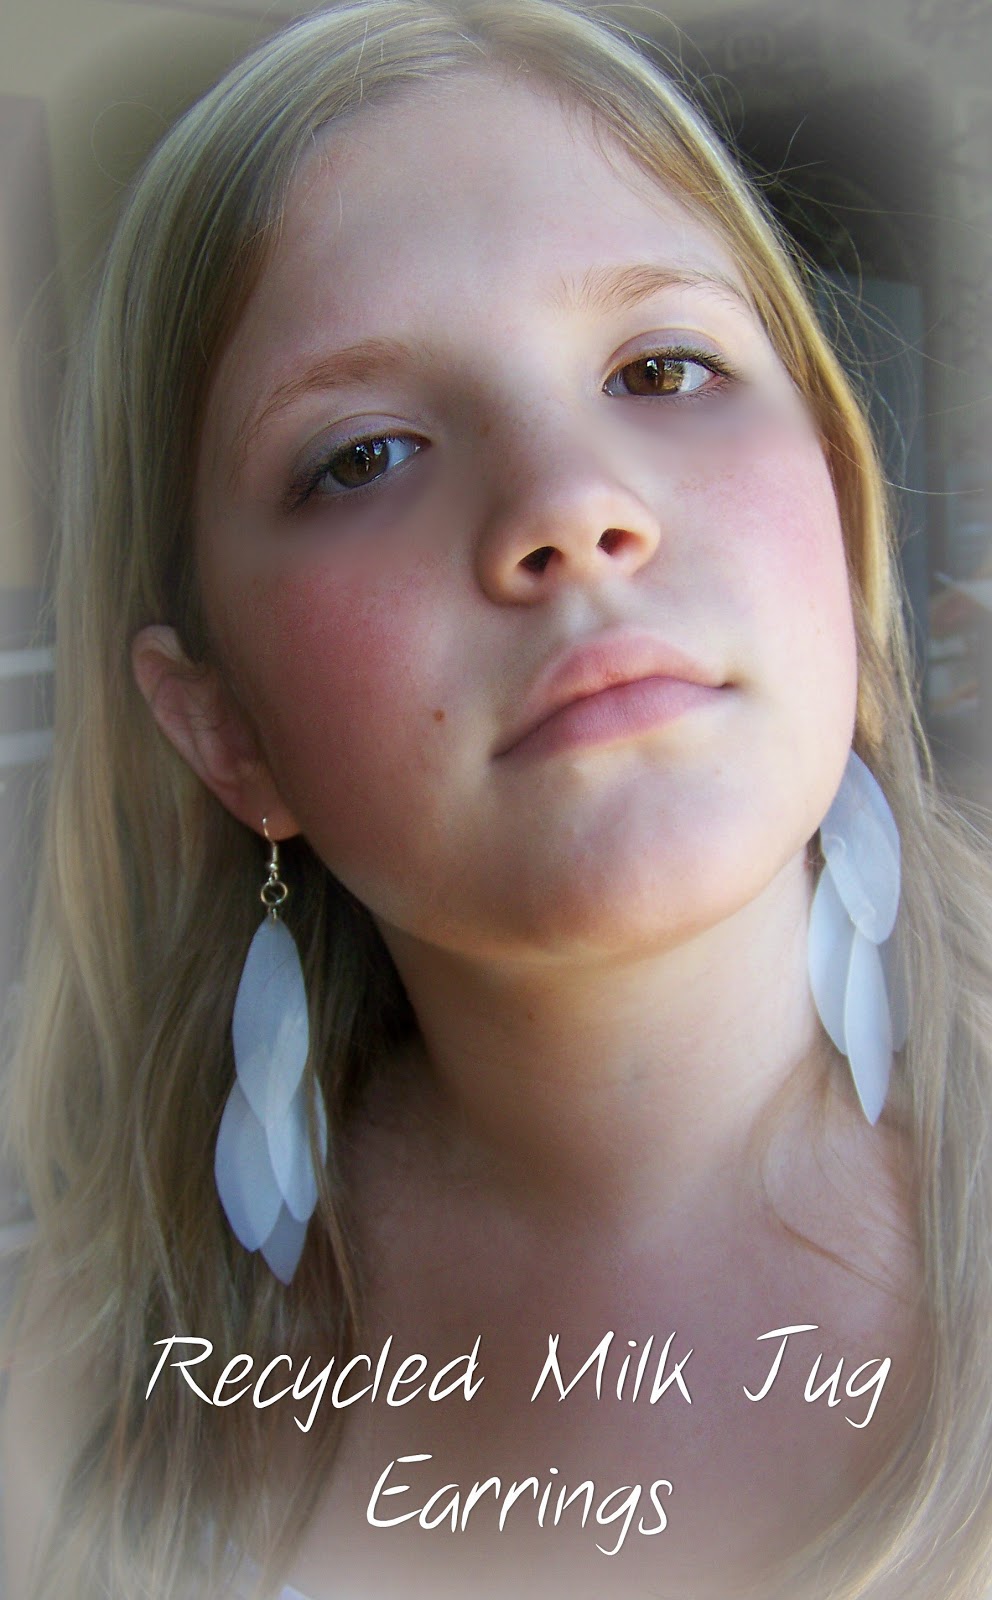
Earrings made with milk jugs ~
Milk jugs can be shaped with twisting but do not respond well to heat.

Earrings fashioned out of milk jugs and
old buttons.


Earrings made from "bubble solution" container

Earrings made from a
soda bottle


Made from soda bottles
and food container lid

Cobalt earrings
from body spray bottle


Earrings made from body
spray bottle.

Amber earrings from medicine bottle


These pieces are a fun way to turn recycled items into wearable art! If I can make these, just imagine what you can do!
If you liked this article, don't forget to subscribe!  It's easy, just click on the link on the right side of this page to get all the future great ideas from Poppy's Money Tree House!

reade more... Résuméabuiyad

2012 March Haul

Mood:  

I will not talk much in this post... Having said that, I'm going to let the pictures do the speaking today. :)

So yea, Let's Begin~ *MARCH HAUL!*

I will start off with Etude House products followed by, Innisfree and the rest.....~:
Baking Powder Pore Cleansing Cream, Nail Polish Base Coat and Dear My Blooming Lips-Talk Lipstick(BE103) belong to my friend. And......
 These are mine. My second box of AC Clinic Pink Powder Spot + extreme Kit, Missing U Bee Happy Hand Cream(Queen Bee and Honey Bee). I got the Queen Bee hand cream as a gift for my aunt that explains why it was wrapped up nicely. ;D

L-R: Dear My Blooming Lips-talk Lipstick in RD304 & OR204

Innisfree Jeju Volcanic Steam Towel

My Beauty Diary Mask
Top L-R: Arbutin Whitening Mask & Cooling Mask
Bottom L-R: Aloe Mask & Hyaluronic Acid Moisturizing Mask

I got another 4 boxes of Nexcare Acne Patch again. No picture for that but anyway, they are my holy grail products for sure!

An Eagle-print Loose Tee
I FREAKING LOVEEE THIS TEE!<3

Gadgets/Devices Jack Plug? Jack Pin? Ear Caps? Dust-proof plug?
or whatever it's called...
The rose plug/cap belongs to my mom while the ribbon one belongs to me. :D 

I won this Memorette 8GB Thumbdrive at an event. 

I'm done with my haul for this month. xoxo.
reade more... Résuméabuiyad

The Humble Beginnings of a Year's Supply of Food


I couldn't be more excited! Yesterday marked the real beginning of spring for me.  We began the joyful process of planting our vegetable garden for the year.   There will be many more beds put in before the end of May but somehow the first planting always seems the most important to me.


For our first planting, I am careful to not plant anything that might be damaged by a light frost.   And because I'm planting a little earlier than I probably should for our zone, I never plant all of my seed supply at once.

Beware the Frost!~
 I view this first planting as my "gamble" crop!  We've had such warm weather, it seems unlikely that we'll have a freeze.  But, the possibility exists of a late season hard freeze

What to Plant Now?

So far, we've planted Spinach, Swiss Chard, Lettuce, Snap Peas, Carrots and Cilantro.  My Tomatoes and Peppers are started inside along with some Winter Squash.  

Misc. Planting Tips ~
~For those of us who haven't started veggies from seed inside before, you will want to "sun" your starter plants outside as often as possible (weather permitting).  Taking them outside not only gives better sunlight, the breeze helps strengthen the stalks.  Just remember to bring them back in for the cold nights!


My strong young man, working very hard to help put the
garden in!
~When direct seeding into your garden, remember to plant your seed at a depth in proportion to it's size.  You wouldn't want to plant a tiny lettuce seed an inch deep.  It wouldn't likely germinate. 
On the other hand, you wouldn't want to plant a green bean seed too shallow or birds might help themselves to your seeds. 

You might also find that a heavy rain has washed away your garden to a different location! 

Don't forget to take your baby plants out each sunny day
to give them a little extra sun and to "harden" them
in preparation for transplanting.  I think the breeze is
good for strengthening them!
 ~When planting, first loosen the soil with a hoe or rake, removing any weeds or grass roots from the area that you intend on planting.  Gently level the soil with your hand or a rake. 

~Place your seeds appropriately spaced and at the proper depth.  I like to leave the holes open until I'm completely done so that I can see where I've planted. 

~Lightly cover your seeds with soil and gently "firm" the soil with your hand by patting the garden bed.   A gentle watering will begin the germination process.  Deep watering at consistent intervals is more appropriate once your plants are established but until they have germinated, it is better to keep the soil moist with a light watering each day.  As always, adjust the frequency of watering based on factors such as wind, rain, temperature, etc. 

My sweet girl "helping" in the garden


reade more... Résuméabuiyad

Do It Yourself "Topsy Turvy" Tomato Planter


I love the space saving concept of the "Topsy Turvy" tomato planter.  I think this planter concept is helpful in cutting down on weeding and a perfect solution for people who want to enjoy homegrown tomatoes but don't have a yard.  I'll wager that if you had a window with enough sun exposure you could even grow tomatoes inside your home.


I have looked at them in stores each season but just didn't feel justified in spending the money to purchase one.    I saw on a website a way to make your own using an emptied 2 liter soda bottle and a few simple items usually found around the house.  (I'd love to give credit but it's been over a year since I found the idea and I can't remember the name of the site).

This project was really simple and only took about 15 minutes to complete.  This time includes several interruptions from my 2 year old daughter. 

To make your own "Topsy Turvy" tomato planter, you will need the following items ~

  • Empty, clean 2 liter plastic soda bottle
  • A chopstick, wooden skewer or small dowel rod, at least 8 inches long. (You could also use a metal clothing hanger as I did on my first planter.  However, it was very difficult for me to untwist the hanger and to twist it back into position). 
  • scissors
  • potting soil
  • coffee filter
  • tomato plant
  • wire or string to hang your planter with
  • something to punch holes with (I used a screw but I think any sharp object would work.
*If you like this article, be sure to subscribe to receive all the future helpful tips.  It's easy, free and we never sell or give away your information!

1) Wash an empty 2 liter soda bottle
Remove label if desired.


2) Carefully cut bottom off approximately 2 inches. 
On the bottle I used, there was a ridge at the right spot
which served as a guide.


3) Place the cut bottom portion inside the bottle in an
inverted position.  It should fit snugly


4) With the bottom still inside the bottle, poke 2 holes
through the sides to fit the chopstick or dowel
rod.  You will want to make sure to align these holes
in a centered position so your planter isn't off balance
when hanging.


5) Pull the bottom out and make holes which will
serve as a water dispenser for your plant.


6) This is what my water dispenser looks like.  I made
ten holes and attempted to evenly space them.


7) Choose a tomato seedling that isn't very large yet.
You'll need to be able to thread the plant through the
top off your bottle.


8) Tear a seam in the coffee filter from an edge
to the center.  Wrap gently around the base of your
plant, covering the dirt.


9) Gently work the tomato plant
through the neck of the bottle. 
Use your chopstick to help
lift the plant through the opening if need be.


10) Turn your planter upside down and fill with potting
soil.  You will want to be sure to leave space to place
the water dispenser/lid.
 

11) Thread the dowel rod/chopstick through
the holes.


12) Secure wire to hang the plant. 
 

13) Pour water into the dispenser until water drips
out of the neck of the bottle.


14) Hang your new "Topsy
Turvy" and enjoy!
You should cover the bottle with something to shield
delicate roots from the light.
I used masking tape on one and
duct tape on another.  I think
you could paint the planter with
spray paint prior to putting your
plant in, as well.

To care for your plant, water as needed.

For additional space saving ideas, check out the following -

Vertical Vegetables & Fruit: Creative Gardening Techniques for Growing Up in Small Spaces

 Vertical Vegetable Gardening: A Living Free Guide (Living Free Guides)

Vertical Gardening and Container Gardening - Ideas for Growing Vegetables and Herbs In Small Vertical Places Outdoors and Indoors


reade more... Résuméabuiyad